
Why the Dutch oven method works
A home oven can't make steam the way a commercial bread oven can — and steam is what gives sourdough its blistered, crackling crust. A pre-heated cast iron pot solves this for $60. The dough releases its own moisture into the sealed pot for the first 20 minutes, which gelatinizes the surface starches. Then you remove the lid and let dry heat brown the crust.
That's it. No steam injectors, no lava rocks, no boiling water on a sheet pan. The pot does it all.
If you don't own one yet, see our best Dutch ovens for sourdough under $100 before you start — the pot matters more than any other piece of gear in this guide.
What you need before you start
You can bake sourdough with surprisingly little gear. The list below is the minimum to do it well — not the maximalist setup.
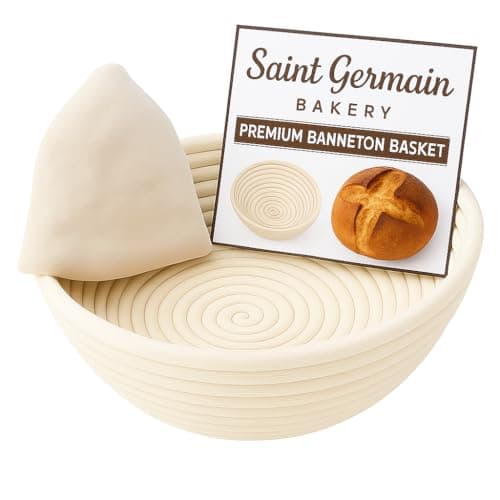
Saint Germain Bakery Premium Round Bread Banneton Basket with…
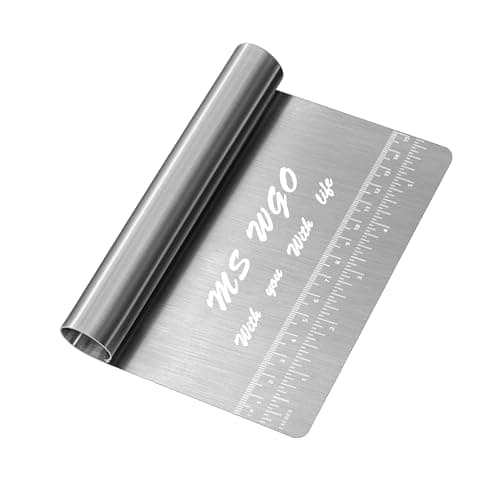
Pro Dough Pastry Scraper/Cutter/Chopper Stainless Steel Mirror…
The recommended Dutch oven for first-timers
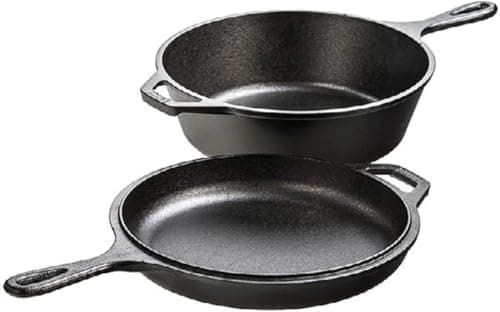
Lodge Cast Iron Combo Cooker - PFAS-Free 2-in-1 3.2 Quart Deep Pot and 10.25 Inch Skillet Set - Dutch Oven with Skillet Lid for Sourdough, Frying, and Camping - Made in the USA
Baking Equipment
- The Ultimate 2-in-1 Cooker: This cast iron set is a kitchen powerhouse. Use the 3.2 quart deep pot for slow-simmered stews or deep frying, then flip the lid to use a standalone 10.25 inch skillet. Use them together or apart for every meal
- Master the Sourdough Crust: Professional bakers love this lodge Combo Cooker for bread. When used together, the skillet creates a tight seal that traps steam, giving your sourdough bread a superior rise and a bakery-quality, crispy crust every time
- Naturally PFAS-Free: We season our Lodge Cast Iron with 100% natural vegetable oil right at the foundry. You get an easy-release surface that improves with use, without any synthetic coatings or chemicals
The Combo Cooker's inverted-skillet loading is the single biggest difference between a frustrating first bake and a successful one. You score the dough on the shallow skillet (cool, safe, easy to see), then drop the deep pot on top as a steam dome. No reaching wet dough into a 500°F well.
Everything else you actually need
- A digital kitchen scale. Sourdough is by weight, not volume. The OXO 11-lb scale above is the standard.
- A 9-inch round banneton (proofing basket). Wicks moisture from the dough surface during cold proof — that's what creates the floured pattern on top.
- A stainless steel bench scraper. For dividing the dough and lifting it off the work surface. Don't skip this; it's $8 and saves your sanity.
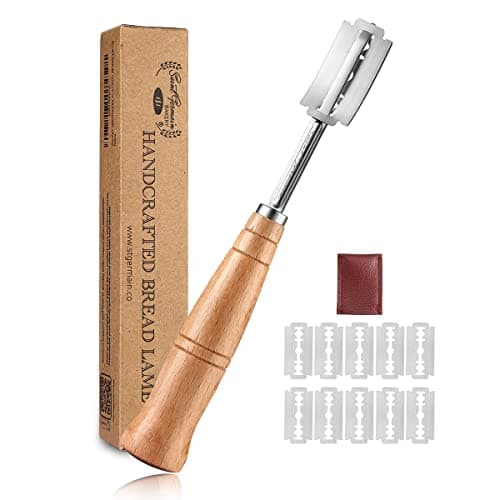
- A bread lame. A razor on a stick. Scores the dough so it expands predictably instead of bursting in random places.
- A starter. ~50g of active starter, bubbling. Buy from a local bakery for $5 or order dried online.
- Bread flour. King Arthur or Bob's Red Mill. Not all-purpose — bread flour has more protein and produces better structure.
- Salt (fine sea salt) and filtered water. Tap water with heavy chlorine can damage the starter.
If you don't have a banneton yet, you can substitute a 9-inch round bowl lined with a clean kitchen towel dusted heavily with rice flour. Not as good but it works.
For a broader gear checklist beyond just bread, see essential baking tools for starting a home bakery.
The dough recipe
This is a single-loaf "tartine-style" sourdough. Adjust quantities proportionally if you want more — but bake one at a time in the Dutch oven.
| Ingredient | Weight | Notes |
|---|---|---|
| Bread flour | 500g | ~75% of total weight |
| Filtered water | 375g | 75% hydration — high but manageable |
| Active starter | 100g | Doubled in the last 4 hours, passes float test |
| Fine sea salt | 10g | Add after the autolyse |
That's the entire ingredient list. Memorize the ratios: 500 / 375 / 100 / 10. You won't need a recipe after the second loaf.
Day 1: Mix, bulk ferment, shape
8:00 PM — Mix and autolyse (10 min active). Combine flour + water in a large bowl. Mix until no dry spots remain. Cover with a damp towel and rest 30 minutes. This is autolyse — flour fully hydrates and starts forming gluten on its own.
8:30 PM — Add starter + salt (5 min active). Add starter and salt to the autolysed dough. Squeeze through with wet hands until fully incorporated. The dough will feel shaggy — that's right.
9:00 PM – midnight — Bulk ferment with stretch-and-folds. Every 30 minutes for 2 hours, wet your hands and perform a stretch-and-fold: grab one side of the dough, stretch it up, fold it over the top. Rotate 90° and repeat. Four folds total per round. Do 4 rounds.
By midnight the dough should be smooth, slightly domed, and showing a few surface bubbles. Cover the bowl and leave it on the counter overnight. Total bulk ferment: ~10 hours.
10:00 AM next day — Shape. Flour the work surface. Scrape the dough out with the bench scraper. Pre-shape into a loose round, rest 20 minutes. Then final-shape: fold all four sides toward the center, flip seam-side down, and use the bench scraper to drag the boule across the counter, building surface tension on the bottom.
Dust the banneton heavily with rice flour. Place the boule seam-side up in the banneton. Cover with a plastic bag.
10:30 AM — Into the fridge. Cold proof for the rest of the day. Minimum 6 hours, ideal 12–16 hours.
Day 2: Cold proof and bake
8:00 PM the same evening — Preheat the Dutch oven. Put the empty Combo Cooker (both pieces, separated on the rack) in the oven and crank to 500°F. Preheat for 30 minutes minimum. Don't shortcut this — cold cast iron will sap 50°F from the oven the moment you load the dough.
8:30 PM — Bake. Pull the banneton from the fridge. Cut a square of parchment paper slightly larger than the boule.
- Flip the banneton over the parchment, releasing the boule onto the paper.
- Pull the shallow skillet half out of the oven (use both hands, it's heavy).
- Lift the parchment-and-boule by the corners onto the hot skillet.
- Score the top — one decisive curved slash about ½-inch deep, at a shallow angle.
- Lower the deep pot half over the top as a lid. Return to the oven.
- Bake covered at 475°F for 20 minutes.
- Remove the lid (carefully — steam billows). Drop oven to 450°F and bake another 20–25 minutes until the crust is deep mahogany and the internal temp reads 205–210°F.
- Cool on a wire rack at least 45 minutes before cutting.
Troubleshooting your first loaf
| Problem | Most likely cause | Fix next time |
|---|---|---|
| Dense, gummy crumb | Under-fermented | Extend bulk ferment 1–2 hours; check starter is truly active |
| Flat, no oven spring | Over-fermented or weak shaping | Cut bulk ferment 1 hour; tighter final shape |
| Pale crust | Oven not hot enough | Verify oven temp with a $10 oven thermometer |
| Crust burst on the side, not the score | Score too shallow | Cut deeper (½ inch) at sharper angle |
| Bottom burned | Bake too long covered | Move rack up one notch or add a sheet pan beneath |
| Doughy center | Pulled too early | Use a thermometer — 205°F internal is the rule |
Your first loaf will almost certainly have at least one of these issues. Loaves 3 through 5 will dial it in. By loaf 10 the protocol will be muscle memory.
What to do next
- Best Dutch oven for sourdough bread under $100 — if you haven't picked the pot yet, this is the next step.
- Essential baking tools for starting a home bakery — for what else belongs on the bench once sourdough sticks.
Related reading
- Best stand mixers for home bakers — once you're baking weekly and the arm work starts to drag.
Affiliate disclosure
Baker Setup is reader-supported. When you buy through links on our site, we may earn an affiliate commission at no extra cost to you. We only recommend products we've researched against the field — never sponsored placements.